ElasticListView
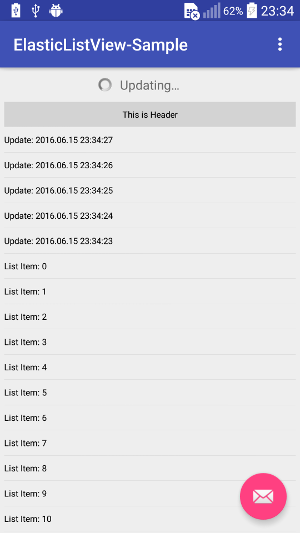
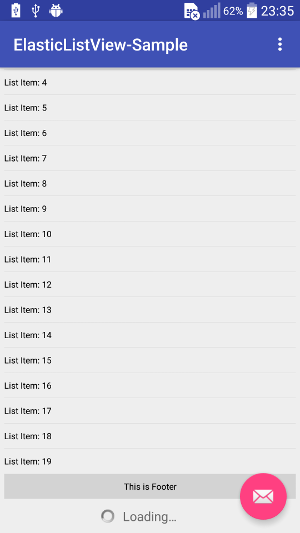
ElasticListView extends android ListView and allows you pull down from the top of ListView to update data and pull up from the bottom of ListView to load data.
Preview
Installation
Gradle
Add it to your build.gradle with:
allprojects {

  repositories {

maven {
 url "https://jitpack.io"
}


}

}
and:
dependencies {

  compile 'com.github.eschao:android-ElasticListView:v1.0'
}
Usage
-
Use it in layout like android ListView. ElasticListView supports all attributes of android ListView
Example:
  <com.eschao.android.widget.elasticlistview.ElasticListView

 android:layout_width="match_parent"

 android:layout_height="match_parent"

 android:paddingLeft="5dp"

 android:paddingRight="5dp"

 android:background="@null"

 android:cacheColorHint="#00000000"

 android:listSelector="#00000000"

 android:dividerHeight="1px"

 android:scrollbars="none"

 android:id="@+id/listview"

 android:overScrollMode="never"

 android:fadingEdge="none"

>
-
Use it in java codes
Example:
  mListAdapter = new MyListAdapter(this);

mListView = (ElasticListView)findViewById(R.id.listview);

mListView.setHorizontalFadingEdgeEnabled(true);

mListView.setAdapter(mListAdapter);

mListView.enableLoadFooter(true)

.getLoadFooter().setLoadAction(LoadAction.RELEASE_TO_LOAD);

mListView.setOnUpdateListener(this)

.setOnLoadListener(this);

mListView.requestUpdate();
-
Your class should implement OnUpdateListener and OnLoadListener to complete update and load actions
Example:
 public class MainActivity extends AppCompatActivity

implements OnUpdateListener, OnLoadListener {

@Override

public void onUpdate() {

 // do update action

}

@Override

public void onLoad() {

 // do load action

}
-
Noramlly, update and load actions should be run in a separate thread, when these actions are done, you should call the below APIs to notify ElasticListView to change UI accordingly.
Example:
 // Notify update is done
  mListView.notifyUpdated();

 // Notify load is done
  mListView.notifyLoaded();
-
You can enable/disable update and load functions. By default, the update function is enabled and load function is disabled.
Example:
 // Enable/disable update function
  mListView.enableUpdateHeader(true);
 // or false to disable

 // Enable/disable load function
  mListView.enableLoadHeader(true);
 // or false to disable
-
If you added some header views in ElasticListview and now you want to enable update function again, you need to follow the below steps:
- Remove all header views
- Enable update function
- Add all header views back
The intention of these steps is to assure the update header is at the first position.
-
You can customize the update header view and load footer view
Example:
 // Set your own content view of update header and also need to
  // set your update state listener to change UI for different update state
  mListView.getUpdateHeader()

  .setContentView(view, true)

  .setOnUpdateStateListener(stateListener);

// Set your own content view of load footer and also need to
  // set your load state listener to change UI for different load state
  mListView.getLoadFooter()

  .setContentView(view, true)

  .setOnLoadStateListener(stateListener);
-
There are three load action types, the default is AUTO_LOAD
-
AUTO_LOAD: when the load footer appears, the
onLoad()will be called -
RELEASE_TO_LOAD: when the load footer fully appears and touch is release, the
onLoad()will be called -
CLICK_TO_LOAD: when the load footer fully appears and user click it, the
onLoad()will be calledExample:
 mListView.getLoadFooter()

  .setLoadAction(LoadAction.CLICK_TO_LOAD);
License
This project is licensed under the Apache License Version 2.0

